
How to assemble your Globee
Seven steps or fewer, no tools. The spot determines the position in which you click the two halves together.
Assembled step by step
- Marking on the top part (1, 2, 3)
- Triangle on the bottom part
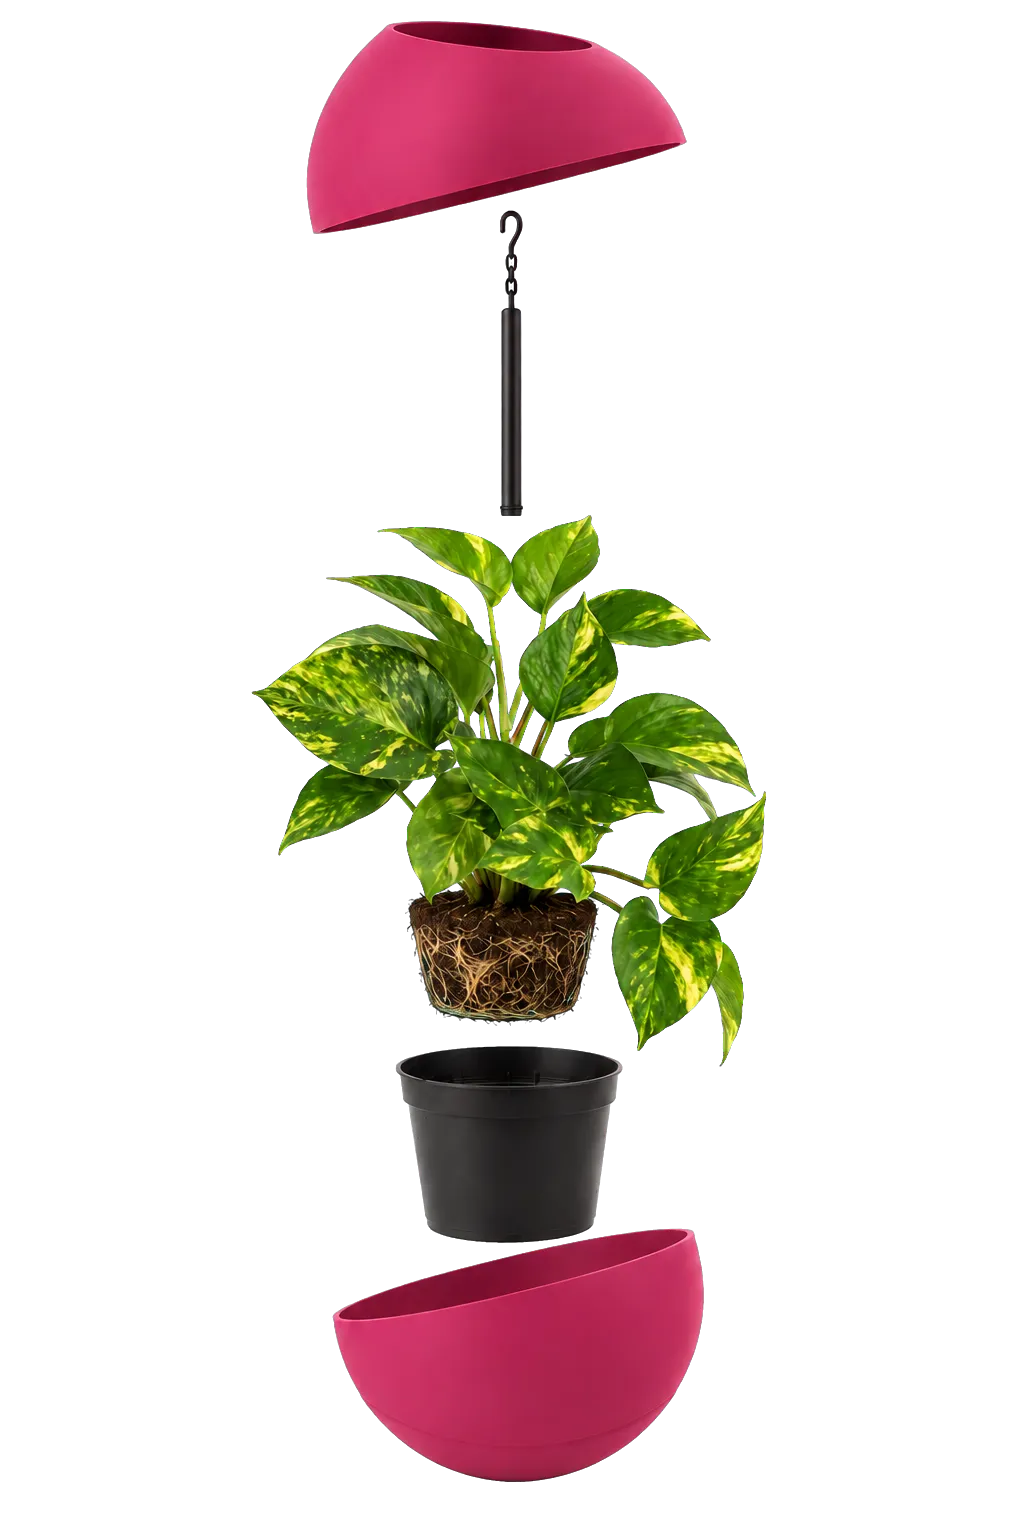
The parts
Top part, bottom part, hanging rod and inner pot.
The parts
Top part, bottom part and inner pot. You don't need the hanging rod.
Marking 1 on the triangle
The top part has 3 markings, the bottom part 1: the triangle. Put marking 1 right above the triangle. That is position 1.
Marking 3 on the triangle
The top part has 3 markings, the bottom part 1: the triangle. Put marking 3 right above the triangle. That is position 3.
Click into place
Press the top part onto the bottom until you hear a click.
Insert the hanging rod
Insert the hanging rod into the bottom part.
Tighten
Tighten the hanging rod.
Place the inner pot
Place the inner pot in the Globee and set your plant straight into it.
Most plants in a standard 12 to 13 cm growing pot fit straight in. Does it feel tight? With some plants, take a little out of the centre first, or make room beforehand with, for example, a screwdriver.
Hang it up
Twist an eye screw into the ceiling and hang it from the chain with hook that comes with it.
You need an eye screw, €0.75. Order it with your Globee
Hang it up
Twist a screw hook into the wall or fence. Hang it by its bottom on the hook, flat against the wall.
You need a screw hook, €0.50. Order it with your Globee
Set it down
Set it down: the bottom is flat, so it stands firm.
Three places
-
On the table
The flat base sits firmly on a table or windowsill. Turn the top half and set your plant at an angle.
Position 3 without the hanging rod
-
On the wall
On the wall in no time.
Position 3 without the hanging rod
-
On the ceiling
Happiest hanging from the ceiling, or from another Globee.
Position 1 with the hanging rod and chain
Plasterboard ceiling? Use a hollow wall or toggle plug. In concrete, a standard plug with a hook is enough.

Water and care
The water reservoir
The plant slowly absorbs the water through the base, so the soil stays moist but not too wet.
Indoors and outdoors
The sturdy plastic is weatherproof and withstands sun, rain and frost. Use it indoors for your houseplants or outdoors on a balcony, terrace or in the garden.
Which plants
Hanging and climbing plants such as epipremnum (scindapsus), spider plant, monstera monkey leaf, rhipsalis and the string of turtles.
Technical facts
- Outer size
- Ø 20 cm
- Height
- 17 cm
- Inner pot
- Ø 13.7 cm
- Water reservoir
- 700 ml
- Load capacity
- up to 20 kg
- Material
- 100% recycled plastic